Looking for metal on a stick?
Hello HammerSaurus!
100's of Hammers here!
Buy Fiberglass and Wood replacement handles here at The Hammer Source!
READ THESE HELPFUL HINTS!!Shipping charges are not refunded on returned handles.
The Hammer Source has a wide variety of WOOD and FIBERGLASS replacement handles. Some handles are made for specific hammers or axes but any handle will fit your tool if the eye shape and eye size are similar.
Buy any 2 handles, get 10% off.
Buy 10 handles get 15% off.
Buy 20 handles or more and get 20% off!
Select 2 different handles so you have a plan B!
If you buy 1 handle and it doesn't fit, DON'T COME CRYING TO ME!
Click here for Fiberglass handles ![]()
Click here for Wood handles
Note: Wood handles are organized by eye shape.
Click HERE for:
None of these dimensions are perfect- and they don't need to be! PUT AWAY YOUR PRECISION CALIPERS!
Read these Tips for Selecting Wood Handles:
PLEASE PLACE YOUR ORDER ON LINE!
Click here for Dalluge handles.
Click here for Garland handles.
Click here for Fiberglass Handles.
Here is a video from a customer on how to replace a wood handle (Thanks Mark):
https://www.youtube.com/watch?v=bA492_J7ahc
Learn how to install a wood handle with this great article and videos from Yoav Liberman of Popular Woodworking.
Handle return policy: You can return a handle for a refund but I do not refund outbound or return shipping costs.
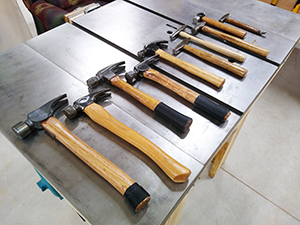
Here are hammers with new handles done by our customer, Jerry:

YOU CAN DO THIS!